A transformative case study by Dr. Andrew Tonelli.
Patients present to our practice with accumulated years of dental changes and issues. In our practice, we first seek to understand the baseline conditions that led to a patient’s current oral health. Next we proceed with steps to mitigate and/or reverse those conditions, to both establish a long term functional system that is functionally sound, and also to improve the patient’s esthetic appearance.
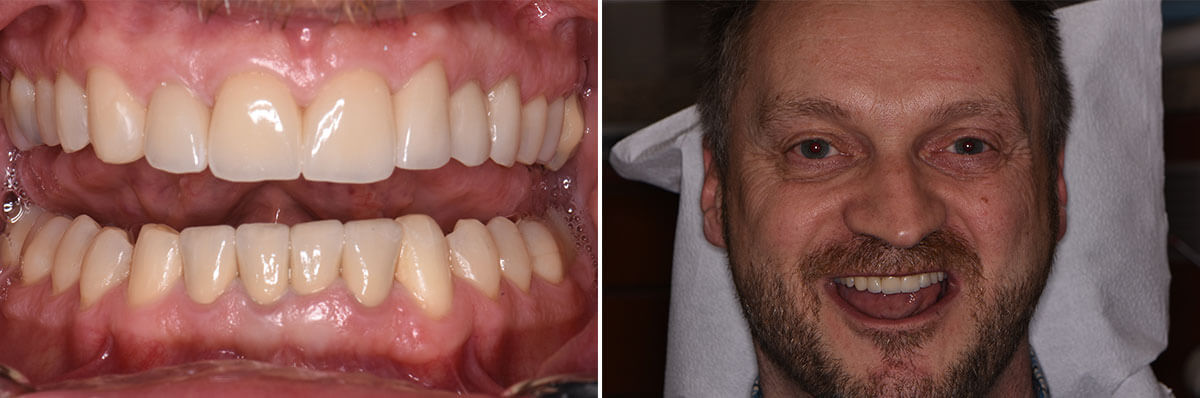
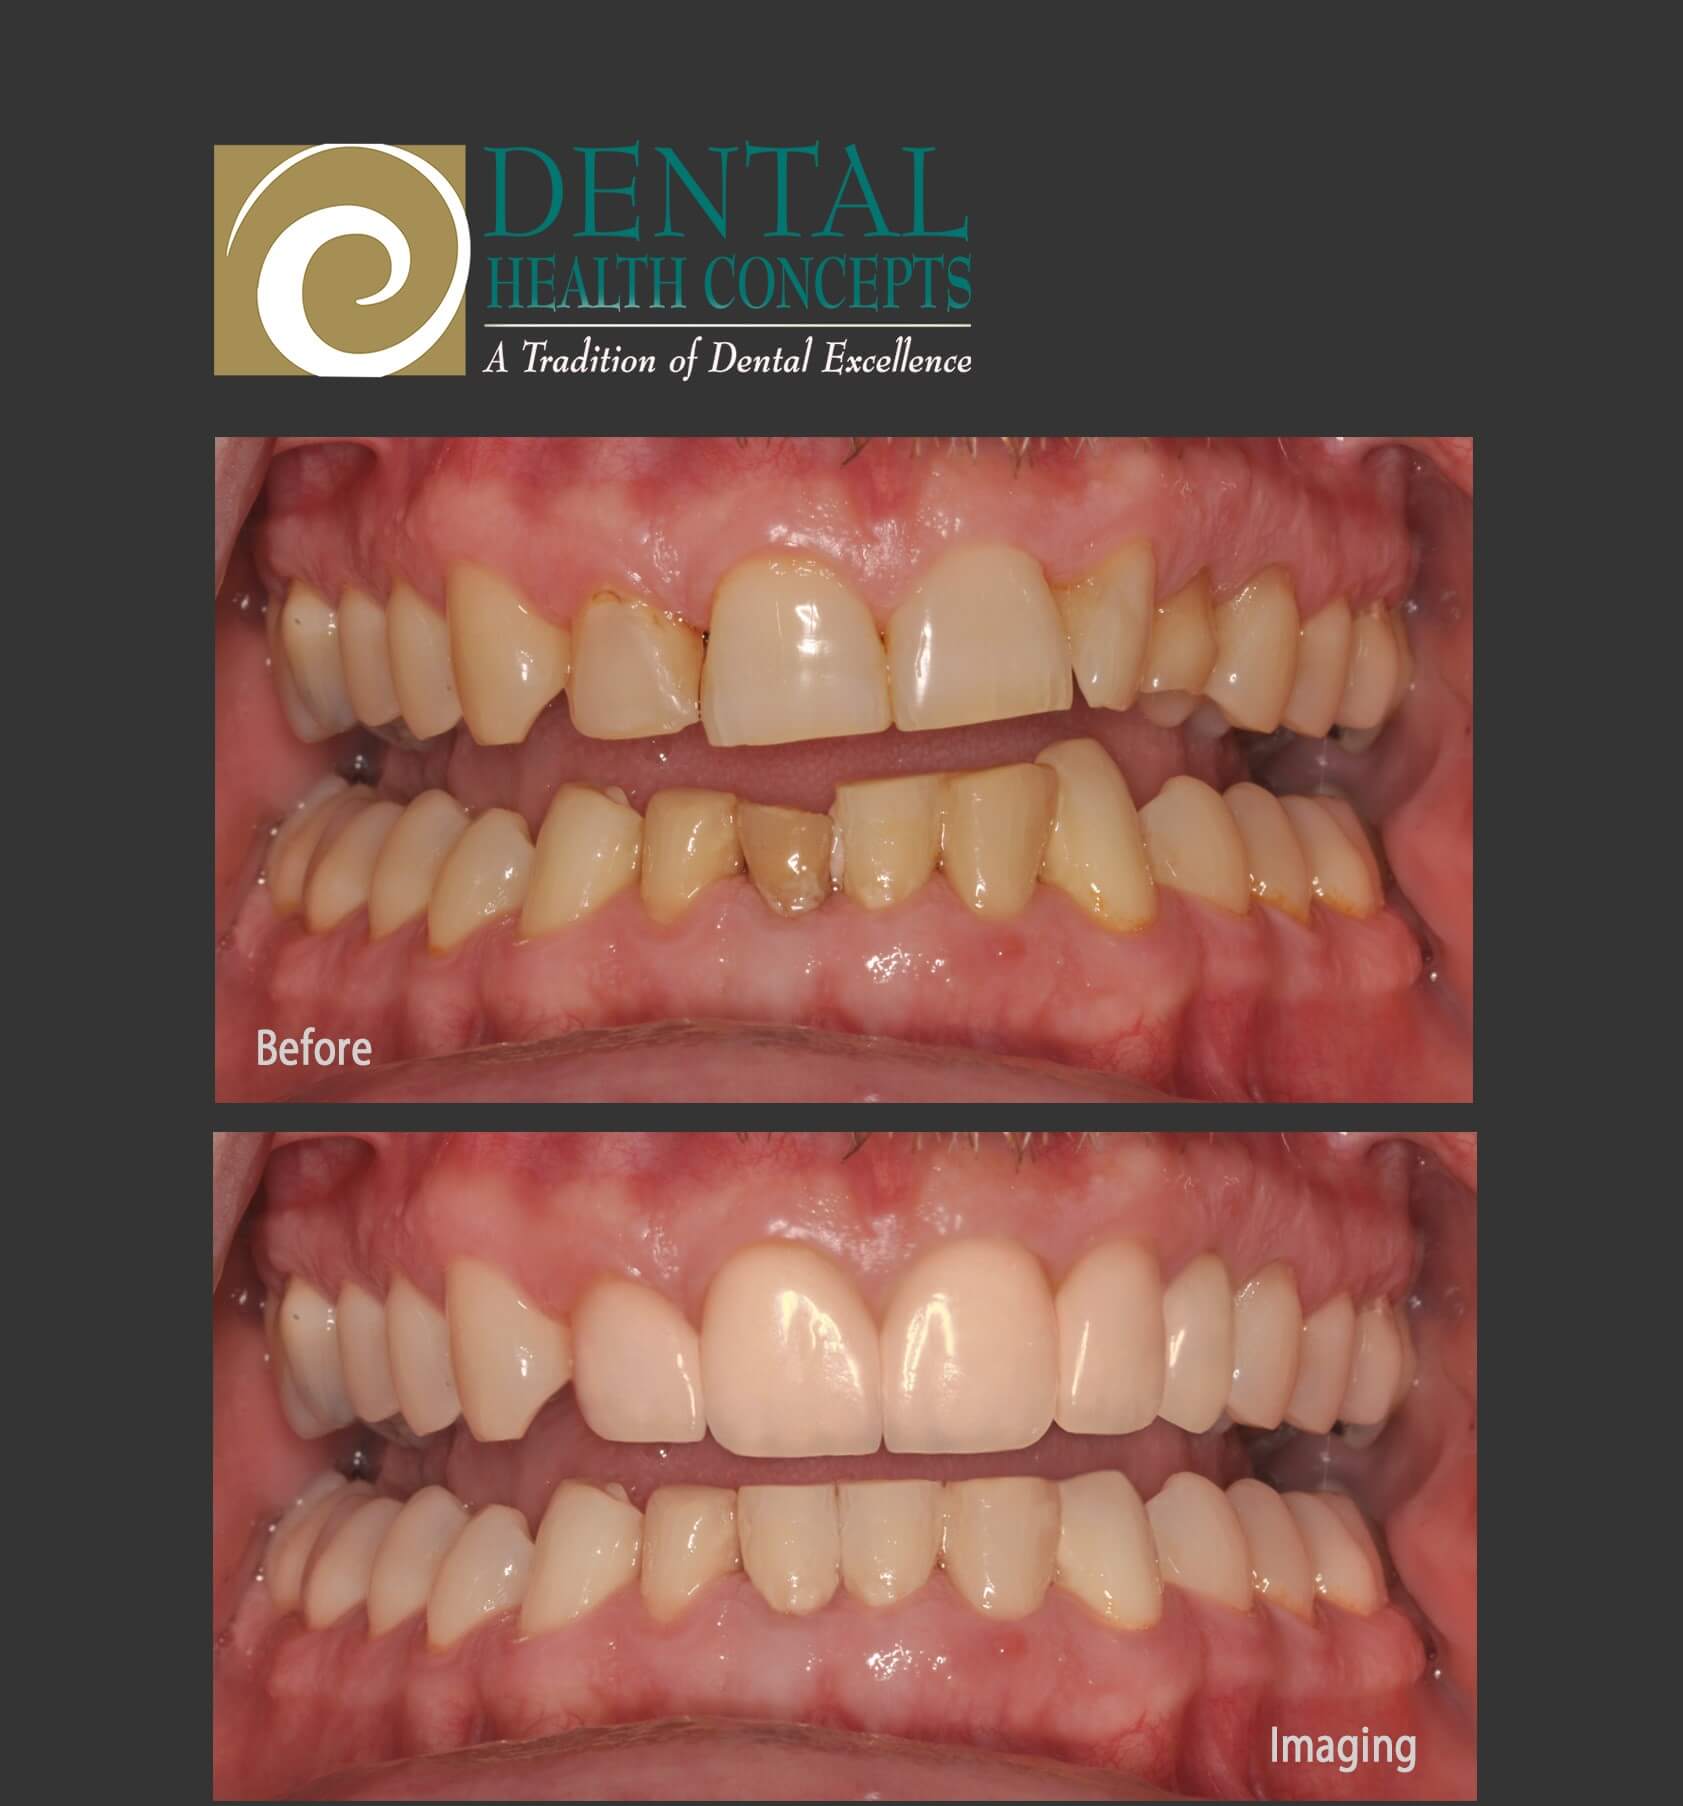
For this patient, there were several underlying issues we were required to navigate. Utilizing orthodontic aligners, targeted bonding, our KOR bleaching system, and a combination of crowns and veneers, we were able to achieve the dramatic transformation shown below:
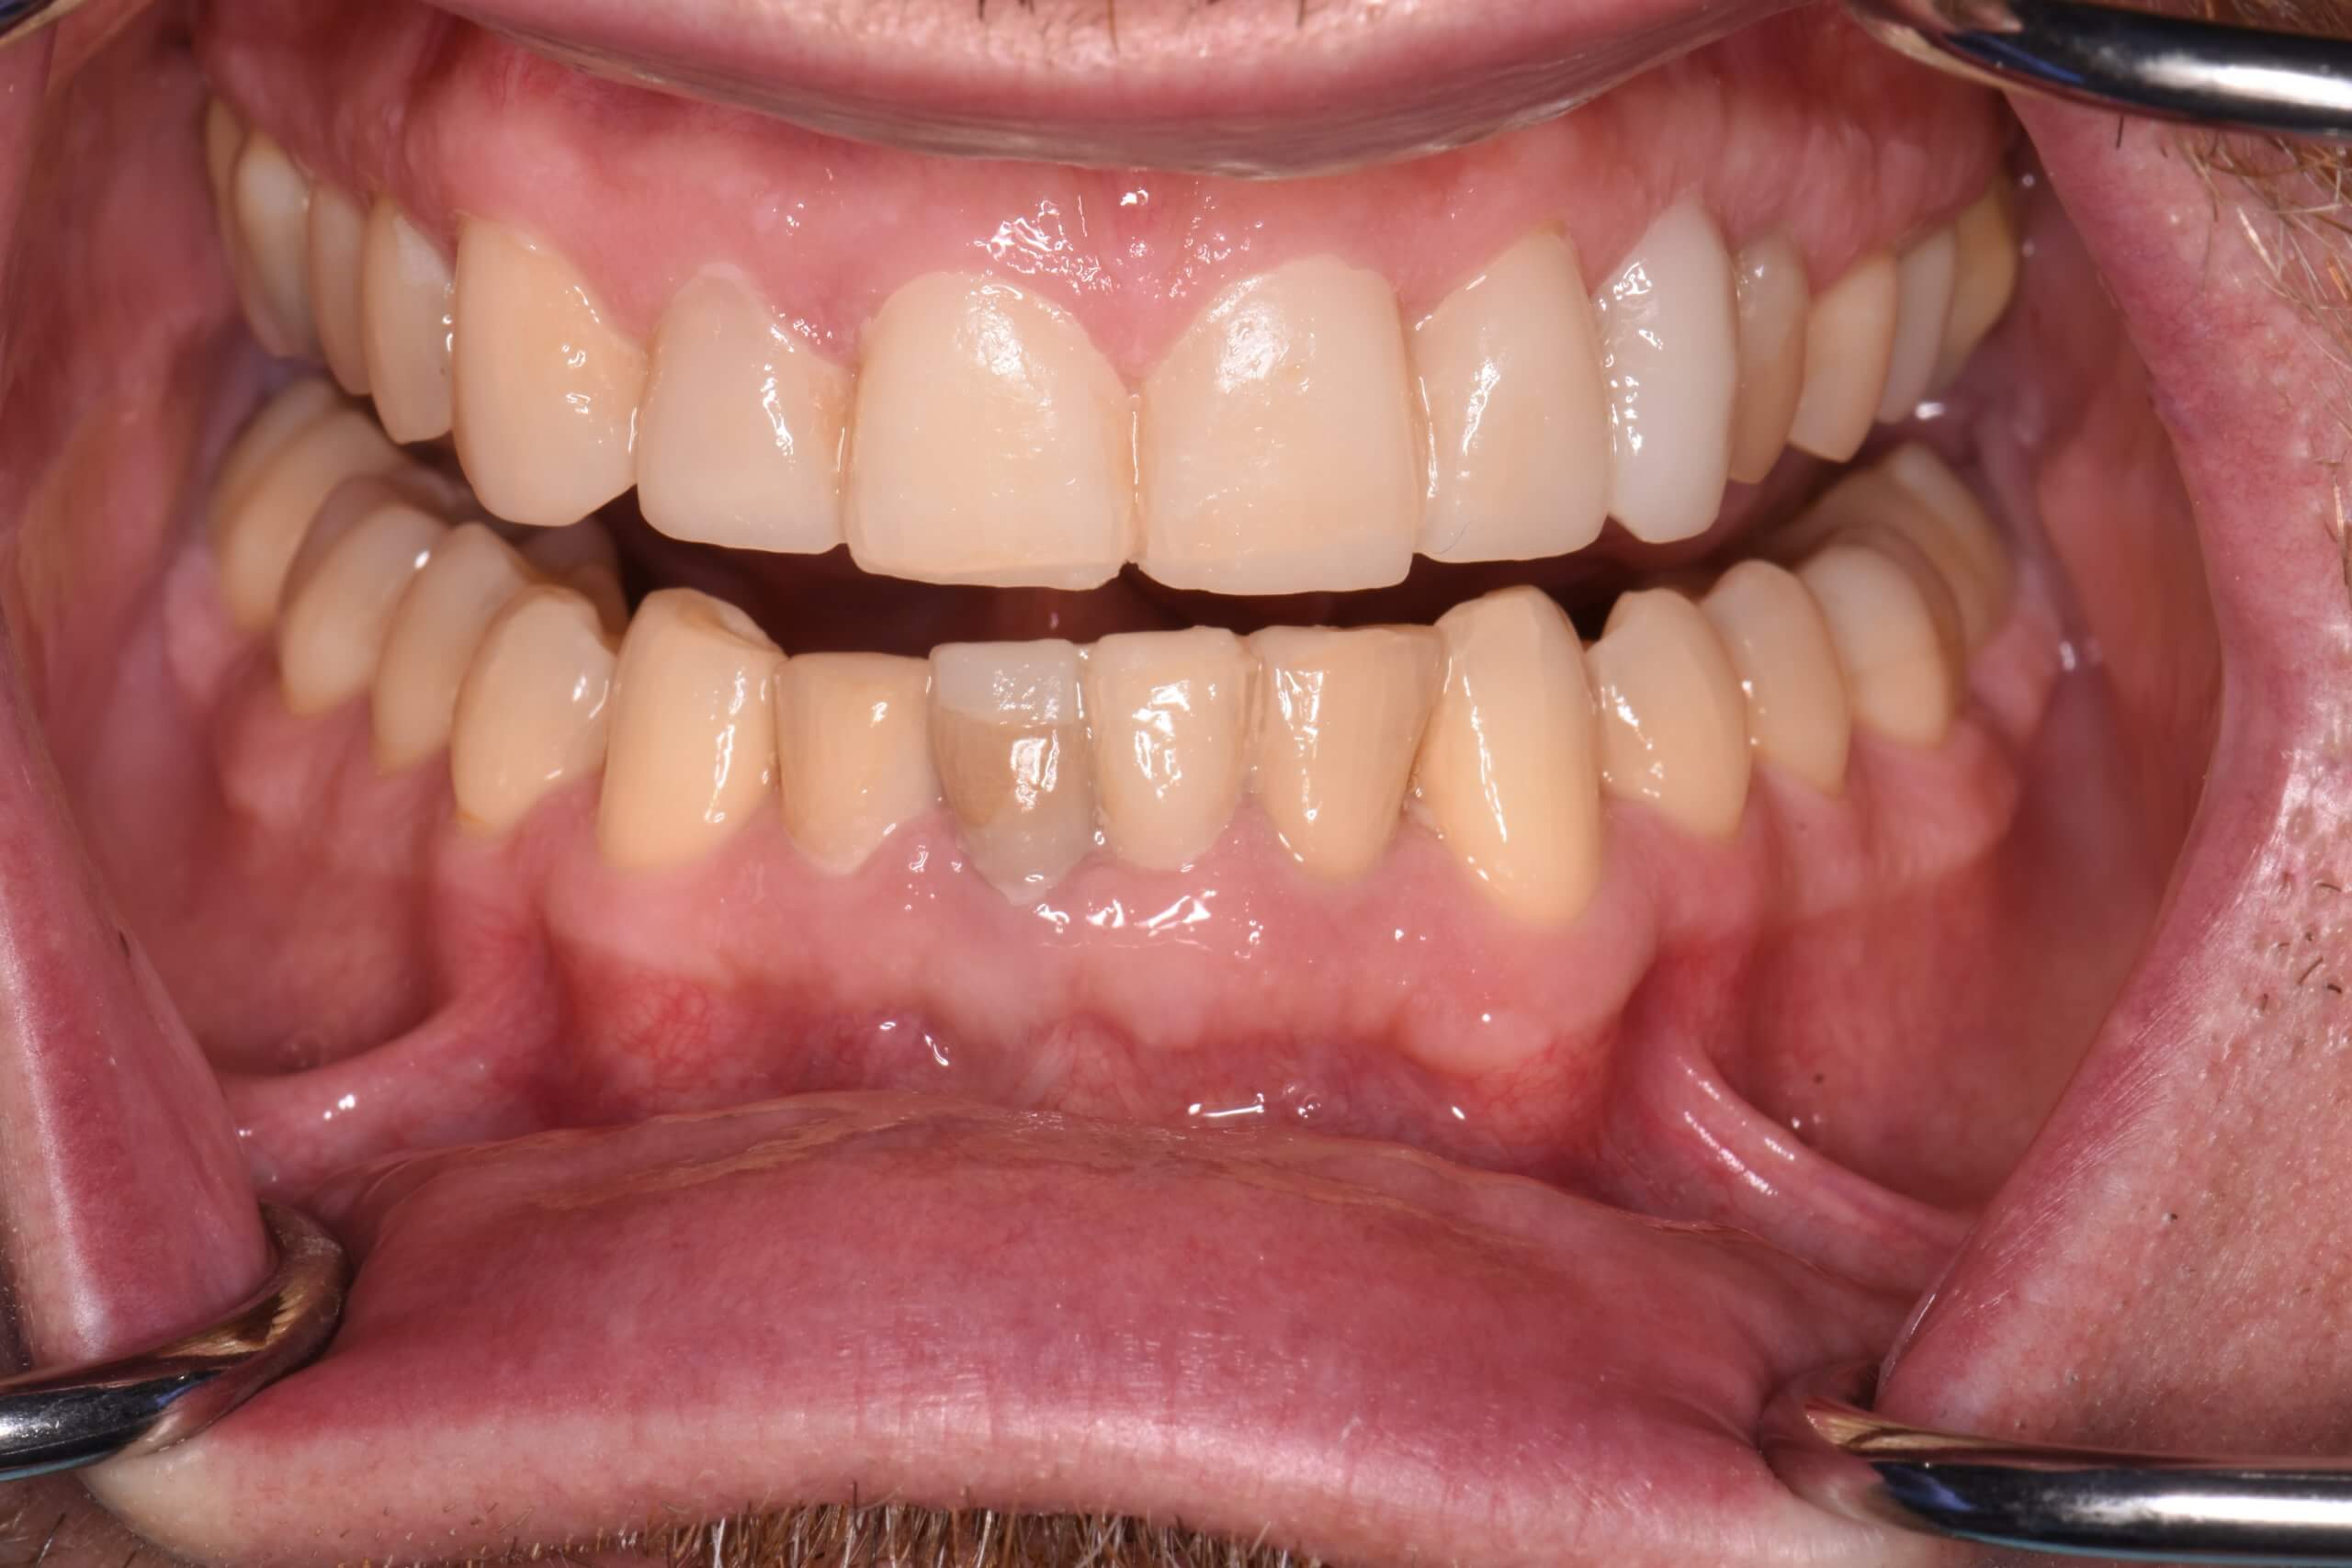
Step 1: Assessing the patient’s baseline condition
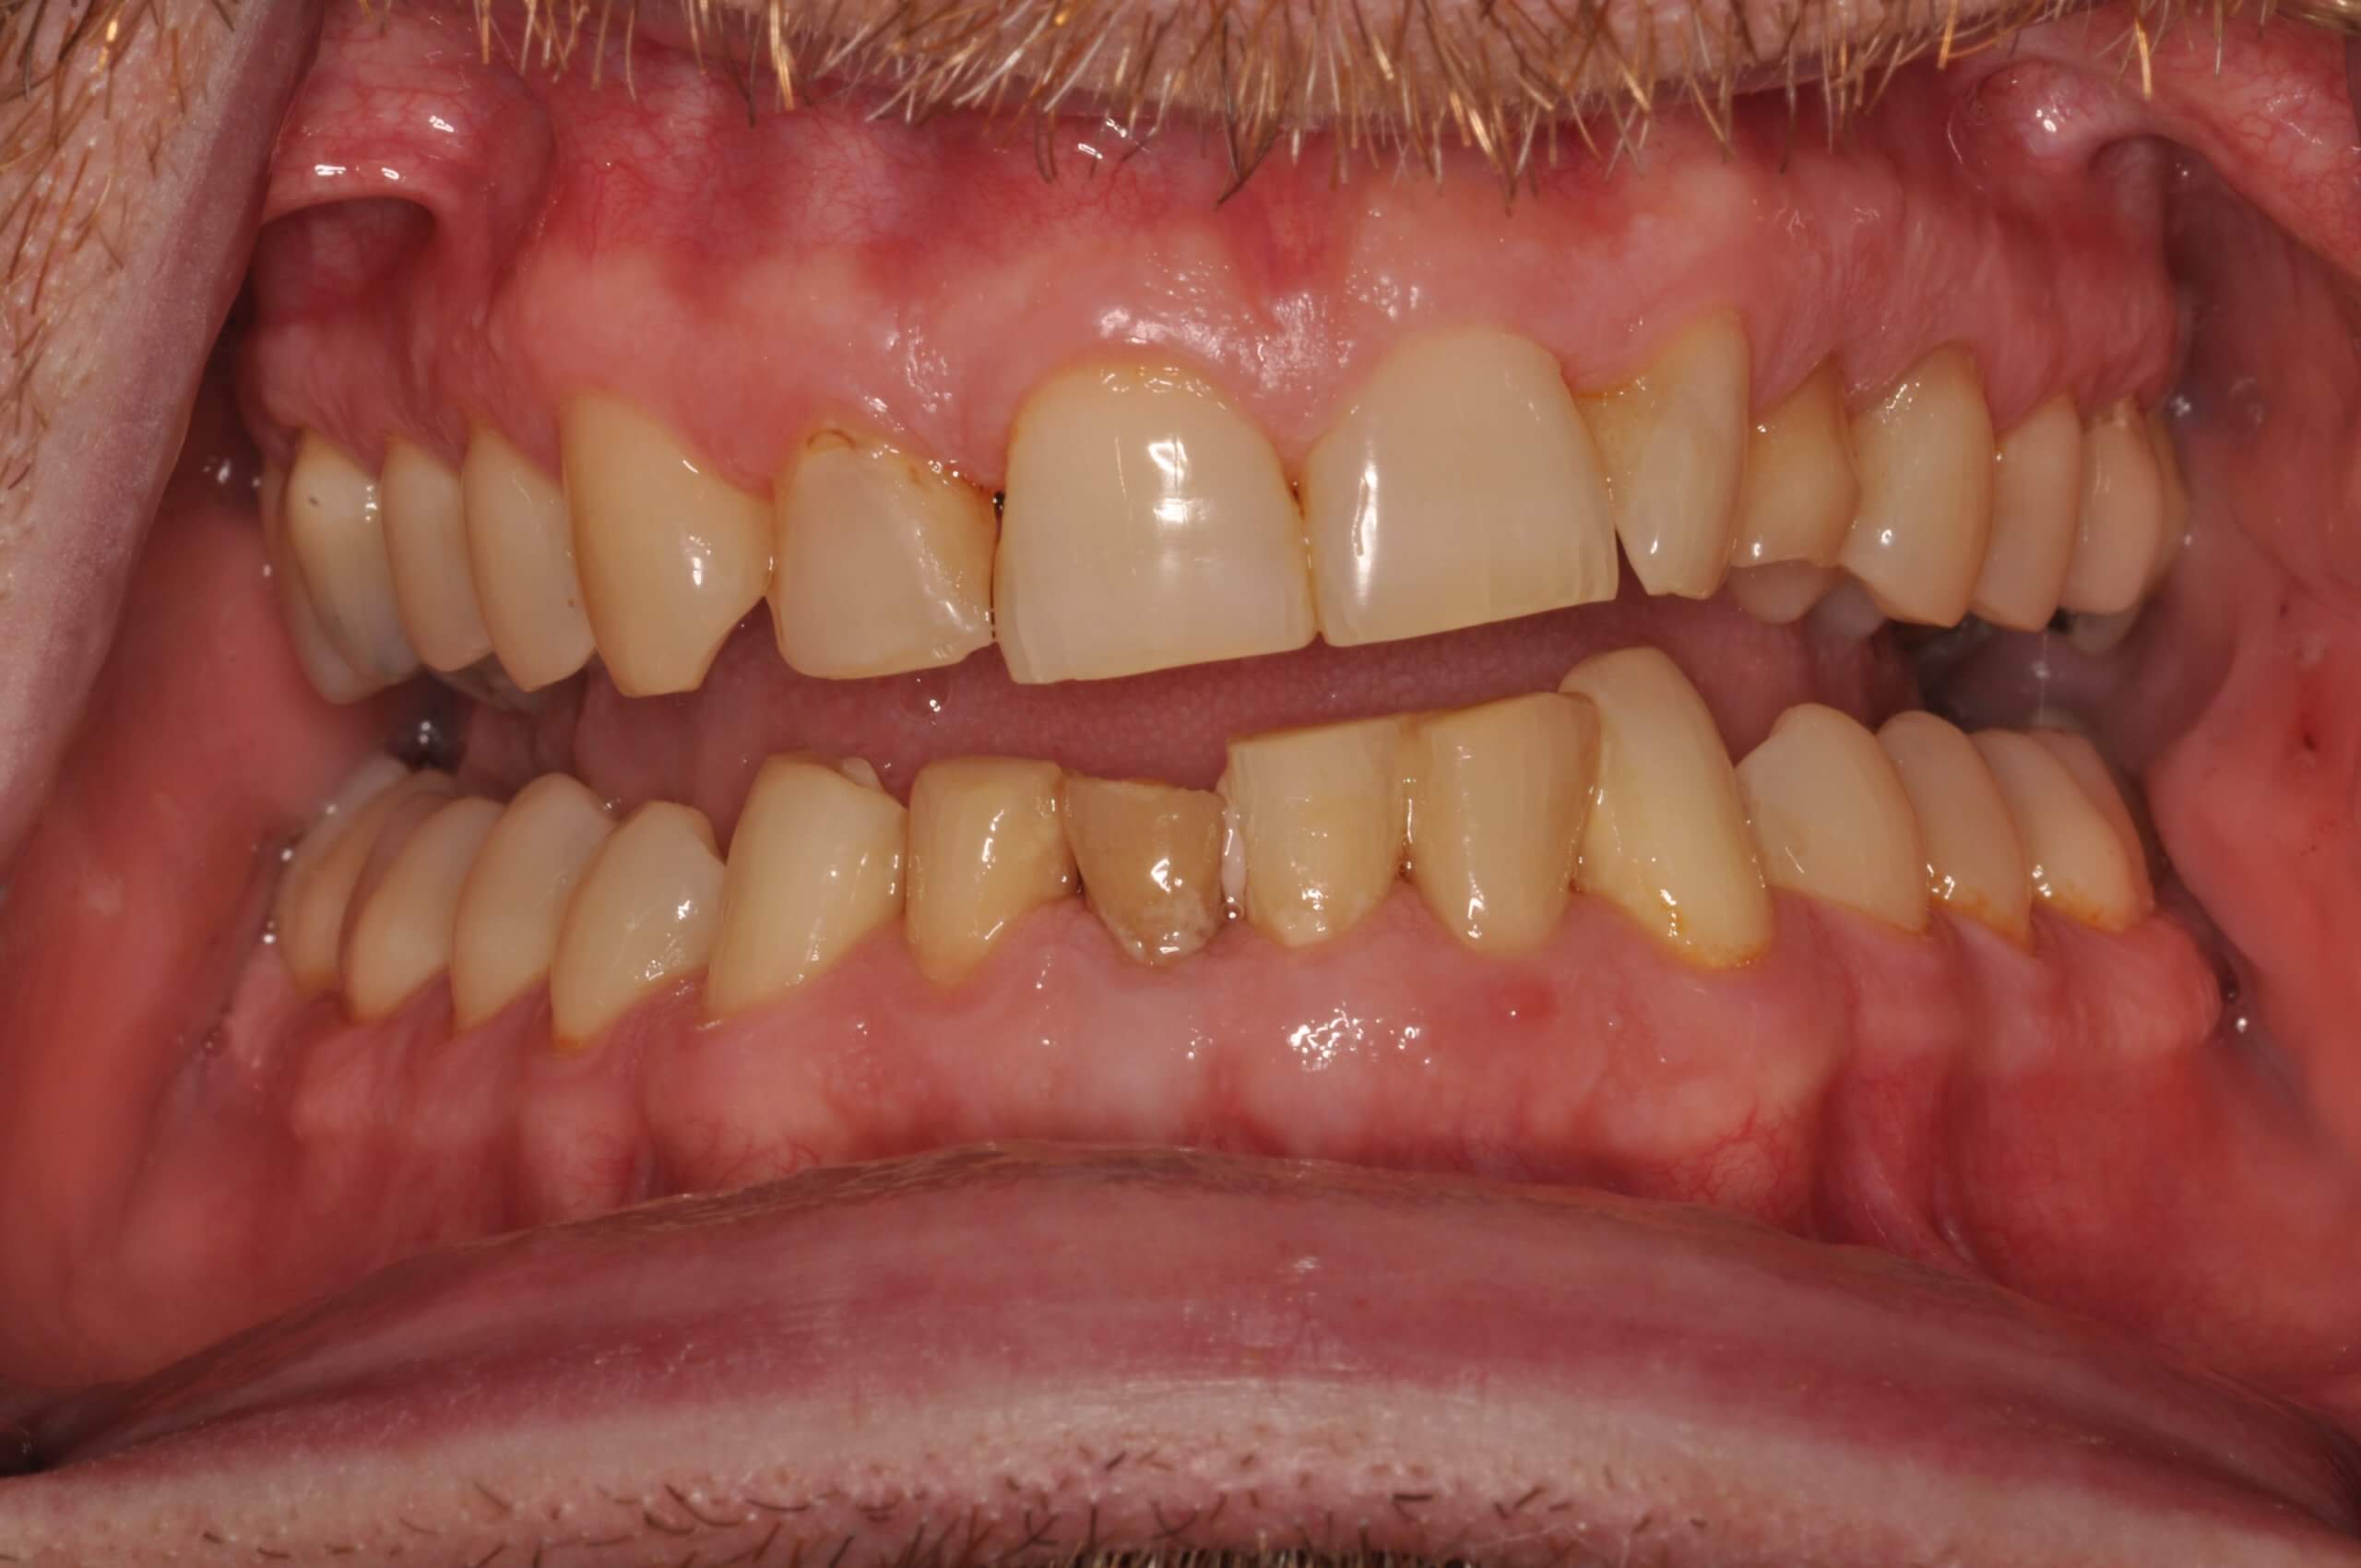
The first step for this patient was to recognize the baseline conditions that led up to that patient’s current dental circumstances. The initial picture above clearly shows that the jaw is not symmetrical, the teeth are canted (angled), that some teeth have over-erupted, and some teeth are broken.
We also note a retained baby canine on the upper left side. The permanent canine in that area had never erupted and was still embedded in the bone above the patient’s teeth (see the x-ray below). Over time, two issues caused the patient’s bite to become canted: First, the roots of the two front teeth tipped away from the embedded tooth, and then over time, the lower left canine wore into the upper left baby canine and subsequently erupted into that space.
To complicate the situation further, the patient had had a previous traumatic injury that resulted in jaw fracture. As a result, all of the lower anterior teeth were root canaled, and one tooth was broken and discolored.
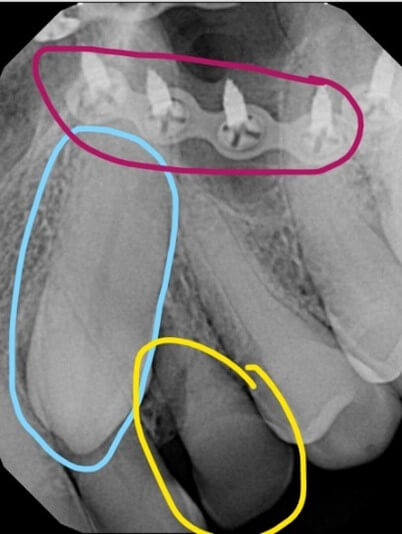
The x-ray image above illustrates the patient’s baseline conditions.
- The blue line encircles the canine that never erupted and is embedded in the bone.
- The magenta line shows the titanium plates that were used to stabilize the jaw fracture.
- And the yellow line surrounds the baby canine that is still present in the patient’s mouth.
The ideal treatment for the embedded tooth would be to actually bring the permanent canine into the arch to make it usable, but the patient did not want to pursue the surgery and orthodontics that would be required. So we considered other options.
Step 2: Visualizing the transition
As part of our initial work-up, we created a visualization of what we thought would be possible for the patient. As you can see, our mock-up is quite similar to our actual final result shown above.
The first step in reaching our desired result was to move teeth closer to their ideal positions by utilizing Invisalign aligners, to bring the lower teeth closer to their ideal position.
After some six months of treatment, the lower teeth were in a position that allowed us to re-build the patient’s bite. As the photo below illustrates, the lower left canine (identified with the arrow) is not sticking up as high as it was prior to the Invisalign treatment.
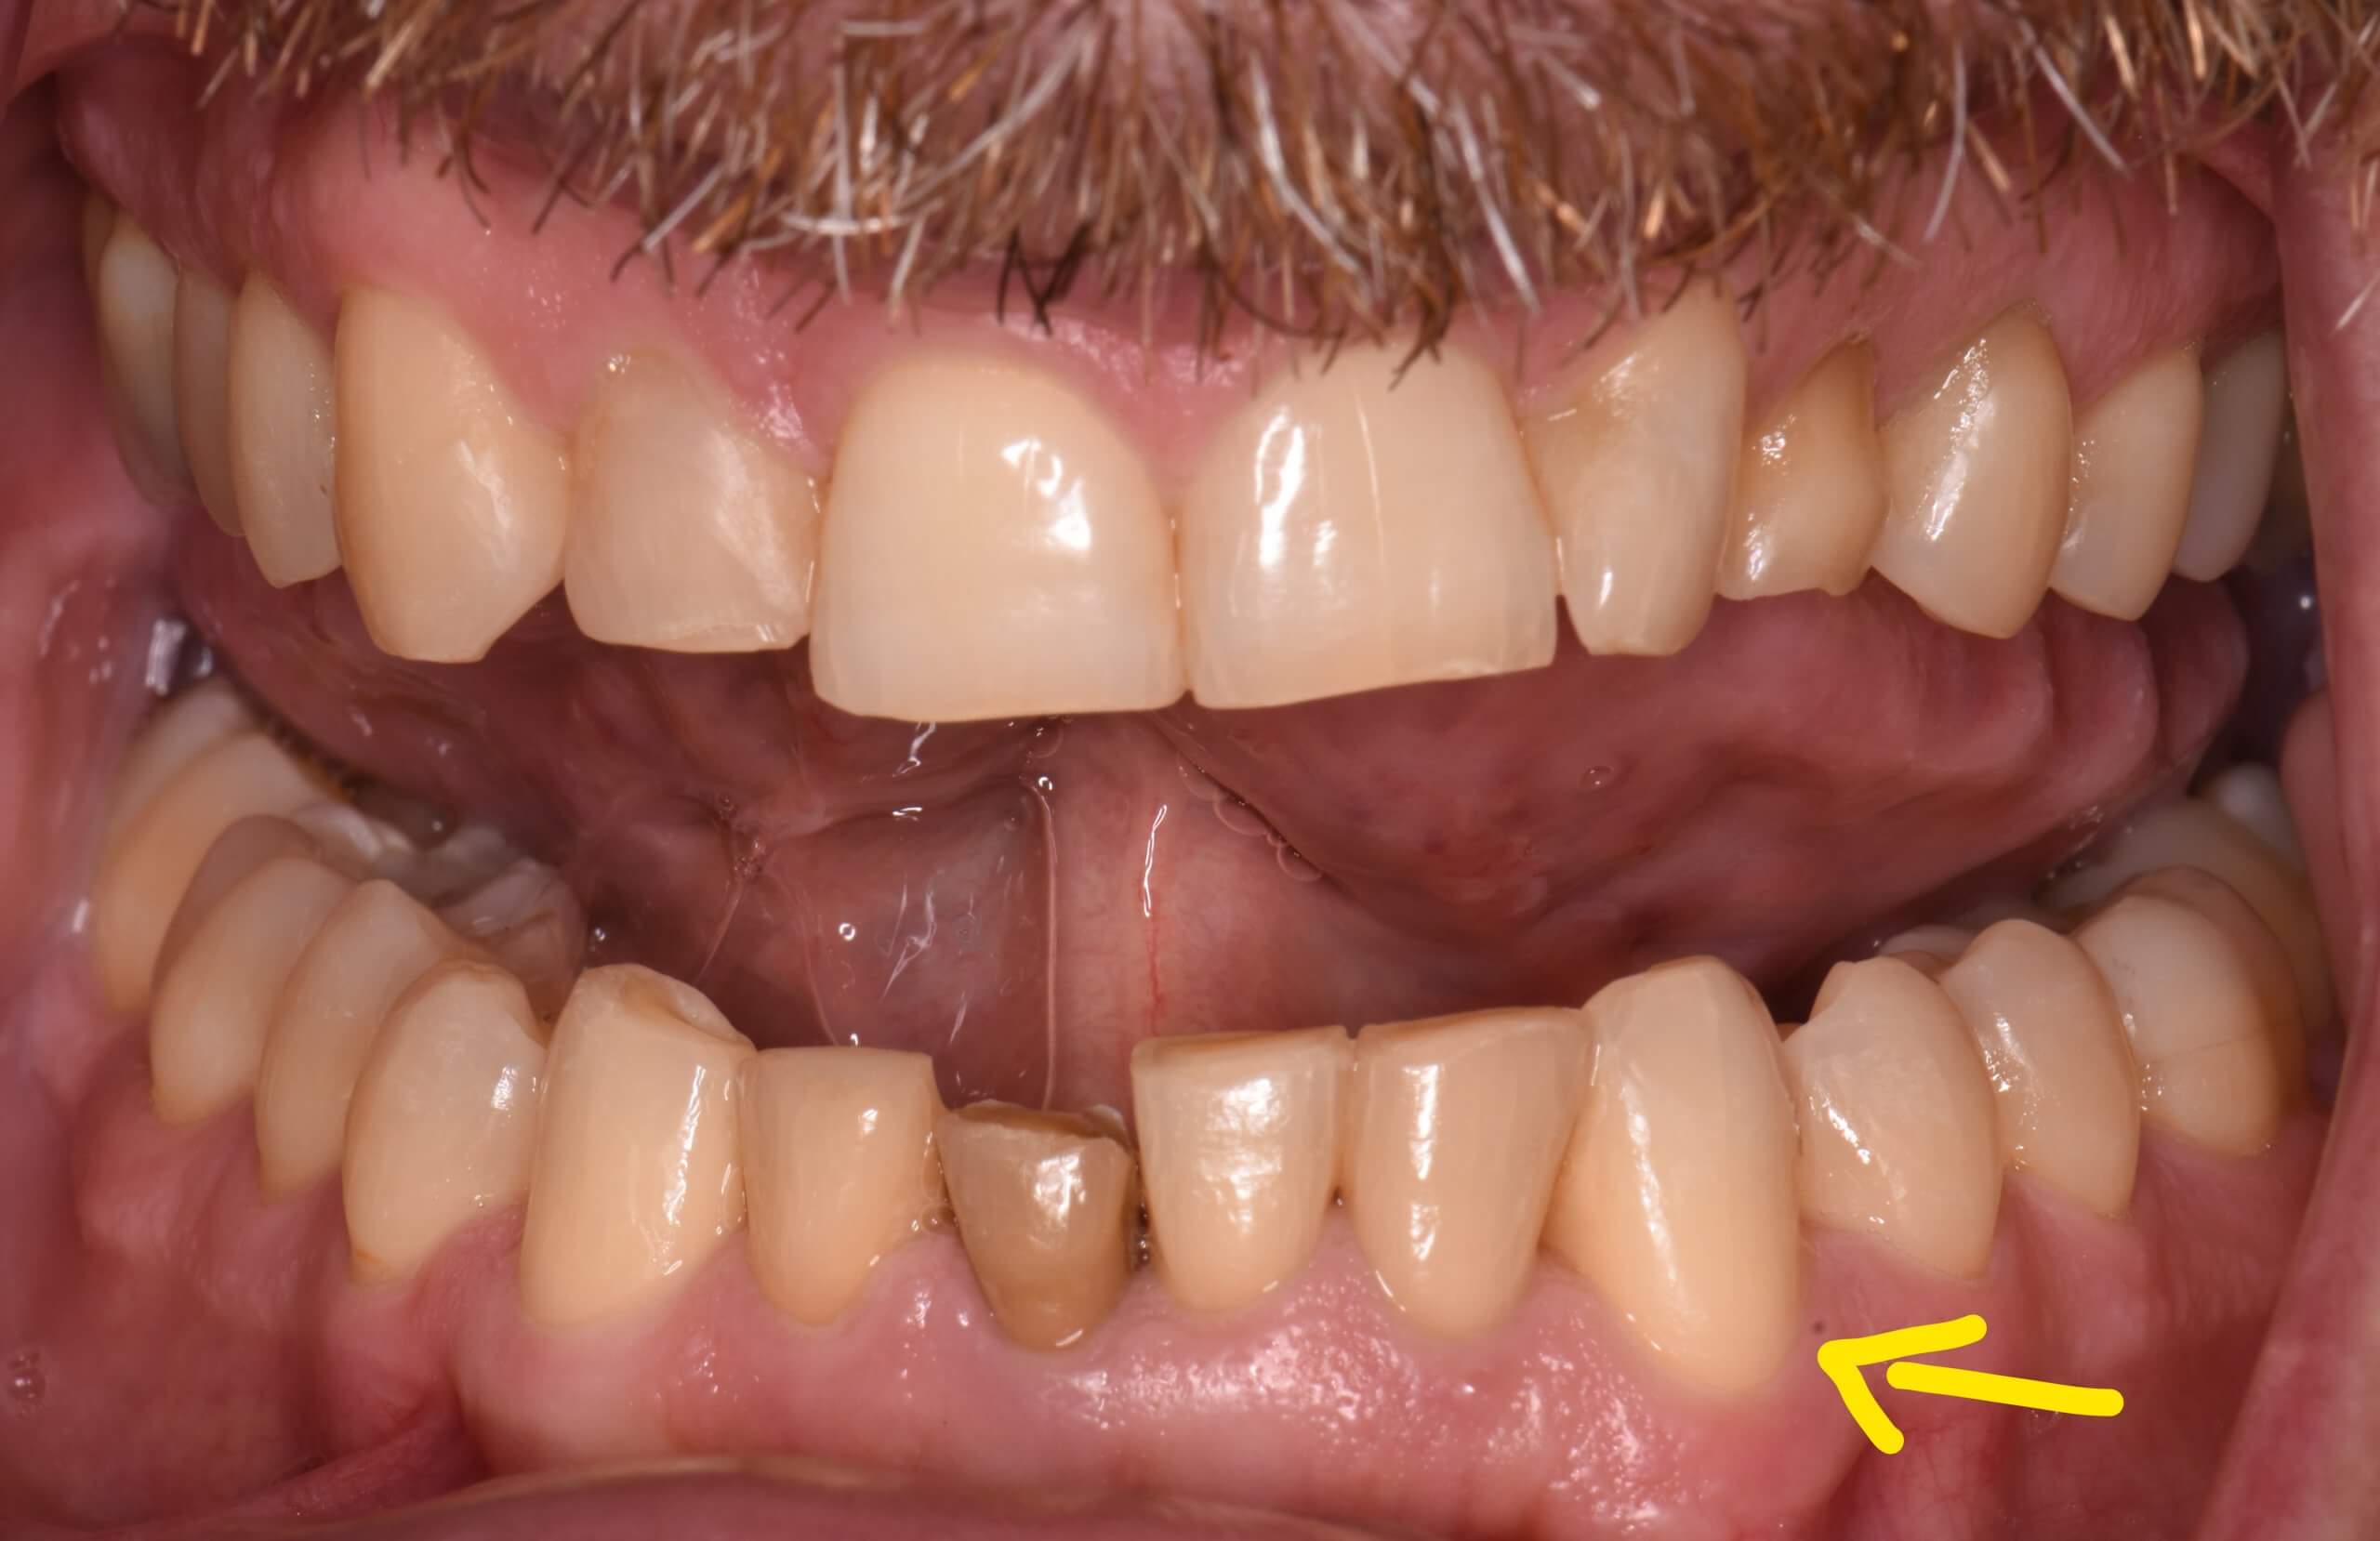
Improved positioning of lower left canine
We couldn’t move the upper left teeth as they would impact the tooth embedded in the patient’s upper jaw bone. So step two was building a plan to rebuild the patient’s bite from the new, post-invisalign position. As part of the planning process, our lab technician Cindy crafted a wax model of how we wanted the teeth to look:
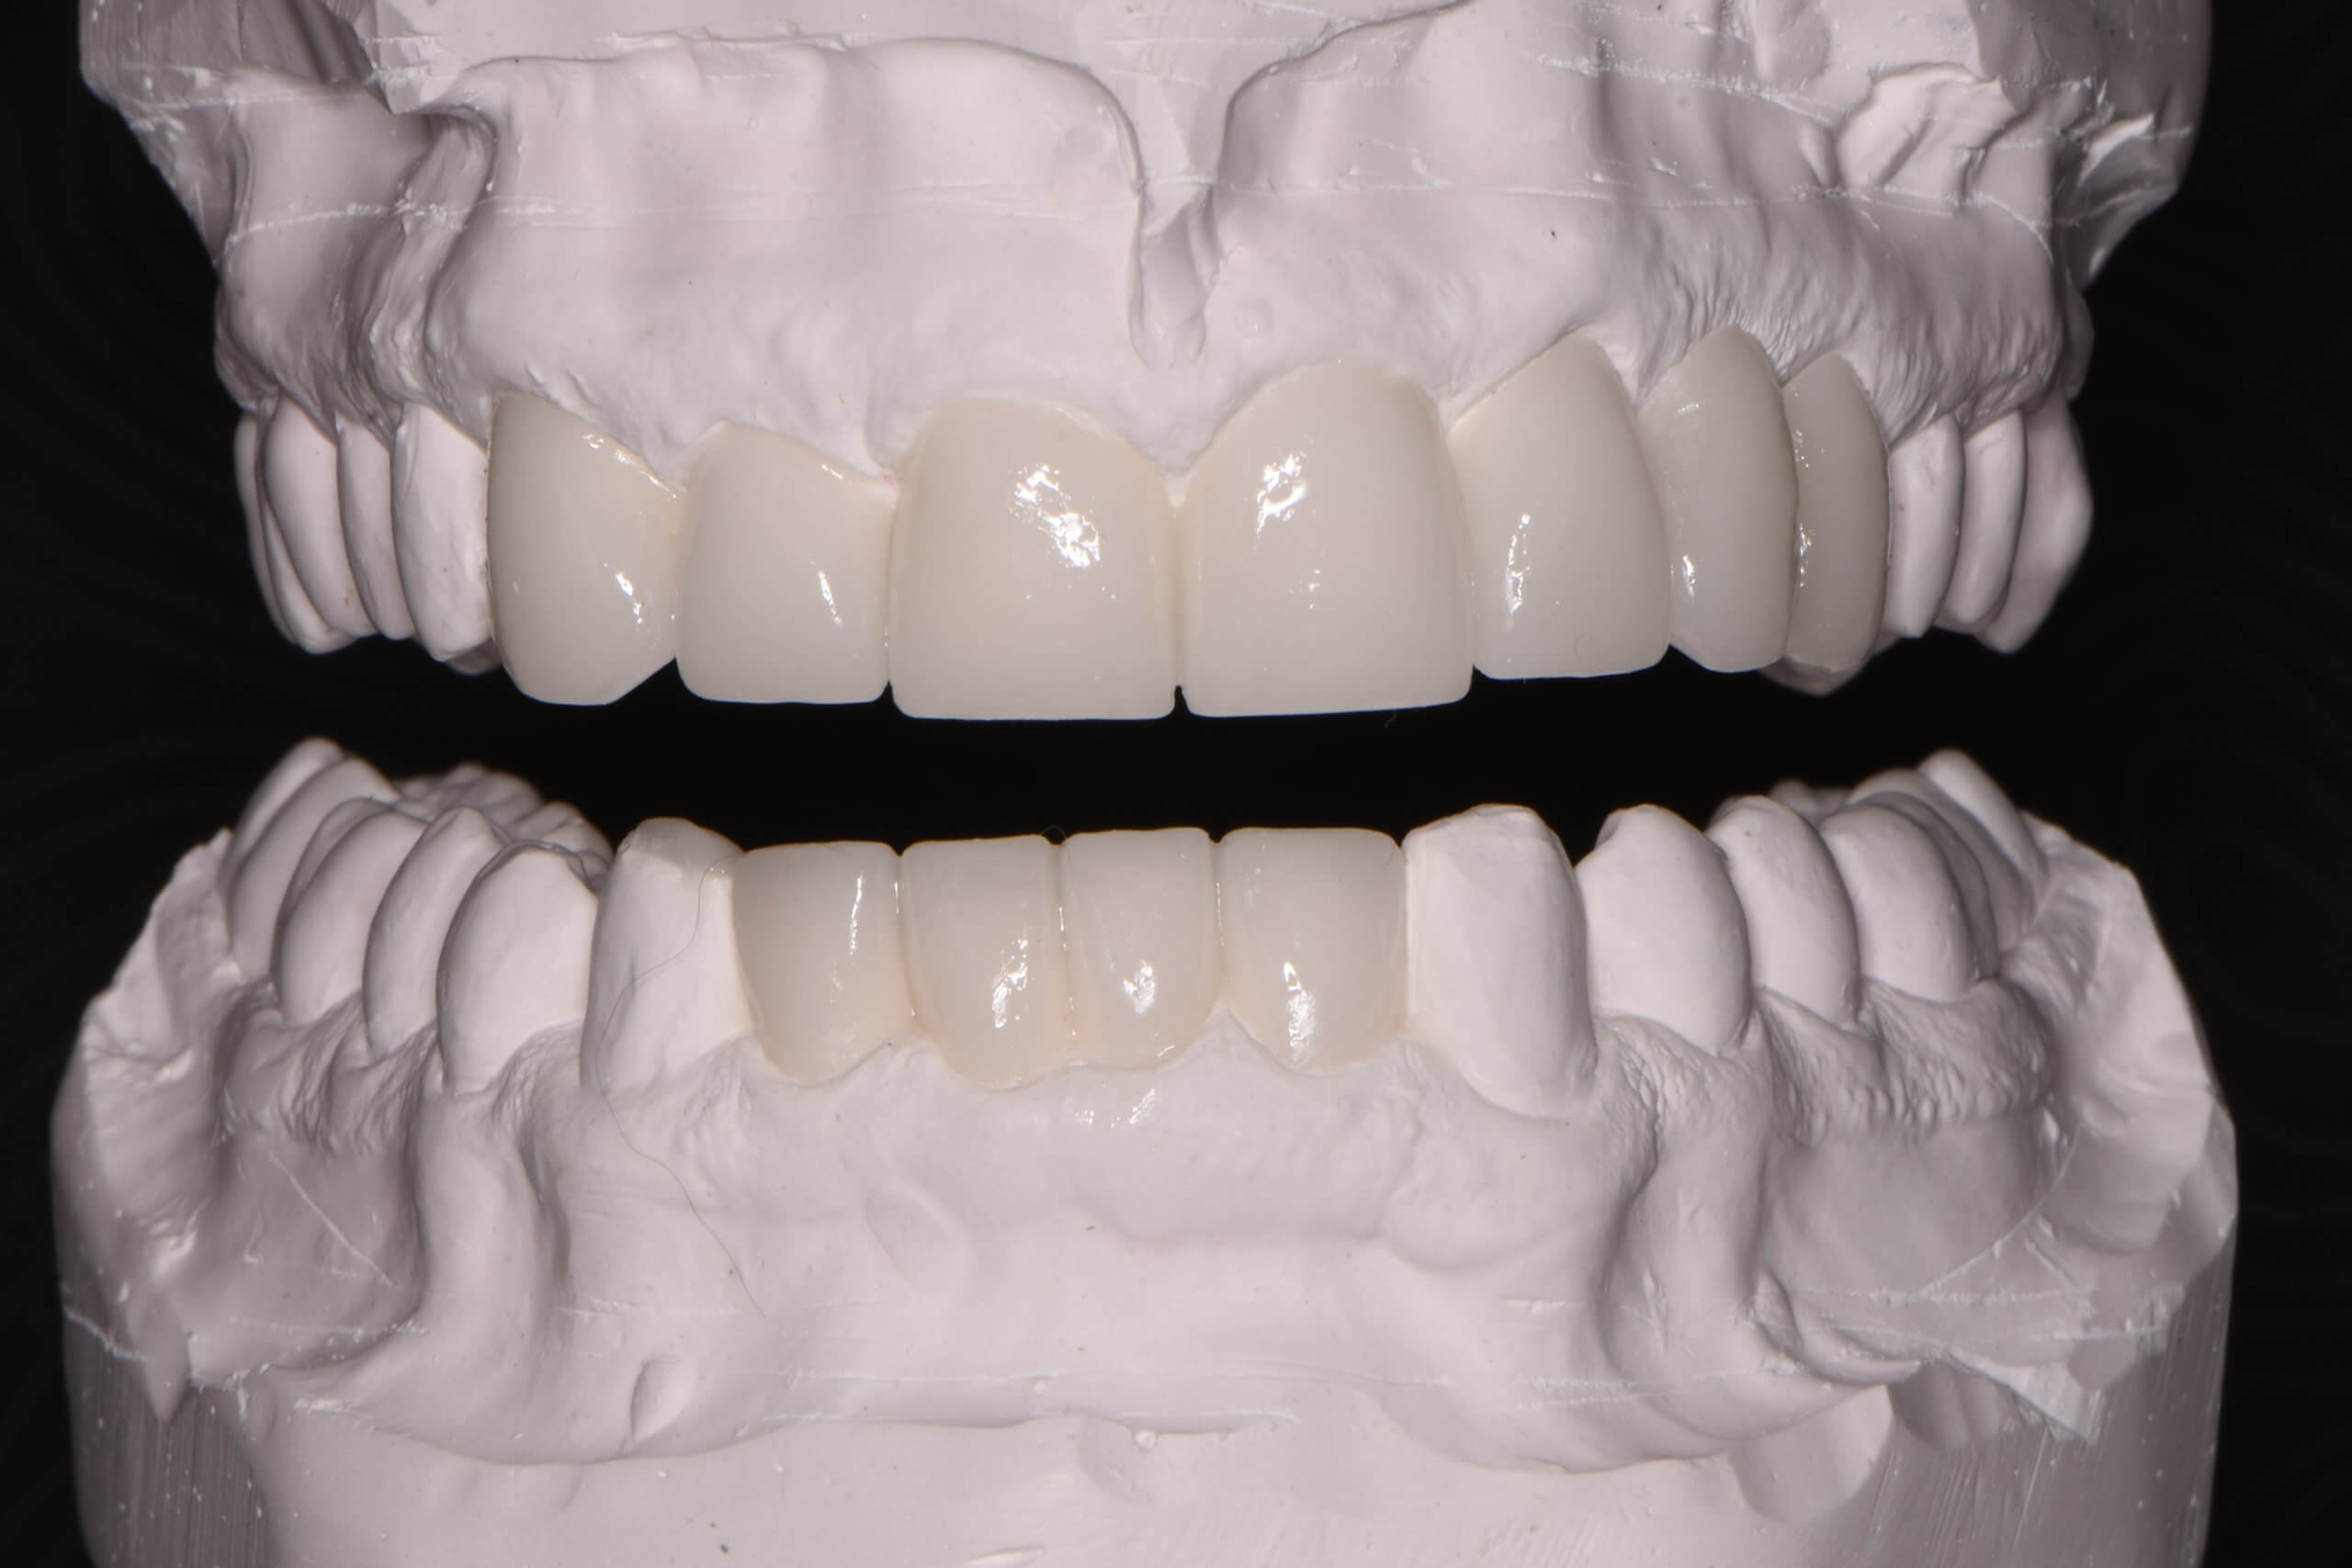
Wax model
We then used the model to create a mock-up of the teeth in the patient’s mouth, where we could more closely evaluate the length, shape and functional movements, while enabling the patient to envision an approximation of the final outcome.
Step 3: Whitening
Prior to our final restorative step we did some whitening and had a really nice result utilizing our KOR bleaching system. We could now match his new teeth to the color we achieved through bleaching.
Step 4: Restorations, crowns and veneers
One difficult decision was whether to attempt to maintain the baby canine that had remained all these years. In our initial exam we had noted that the tooth was reasonably stable. We ultimately decided that we preserve and build-on the baby canine, but making sure that its stress during function would be minimized by surrounding teeth. The goal of preserving this tooth made evaluation of functional movements at each stage of the process all the more critical.
Our next step was to put crowns on the lower front teeth, all of which had previous root canals. We prepared the upper teeth and put on temporary crowns while the final crowns were being fabricated. Since the upper right canine was healthy, we used bonding to improve its shape and the functional movements.
Once the patient’s temporary crowns were in place, we confirmed their final shape for proper jaw movements, and took and impressions for the lab to duplicate those positions.
Mock up of proposed final position for teeth
Temporary material is placed over the teeth in order to evaluate teeth position, bite, and functional movements prior to fabrication of final restorations.
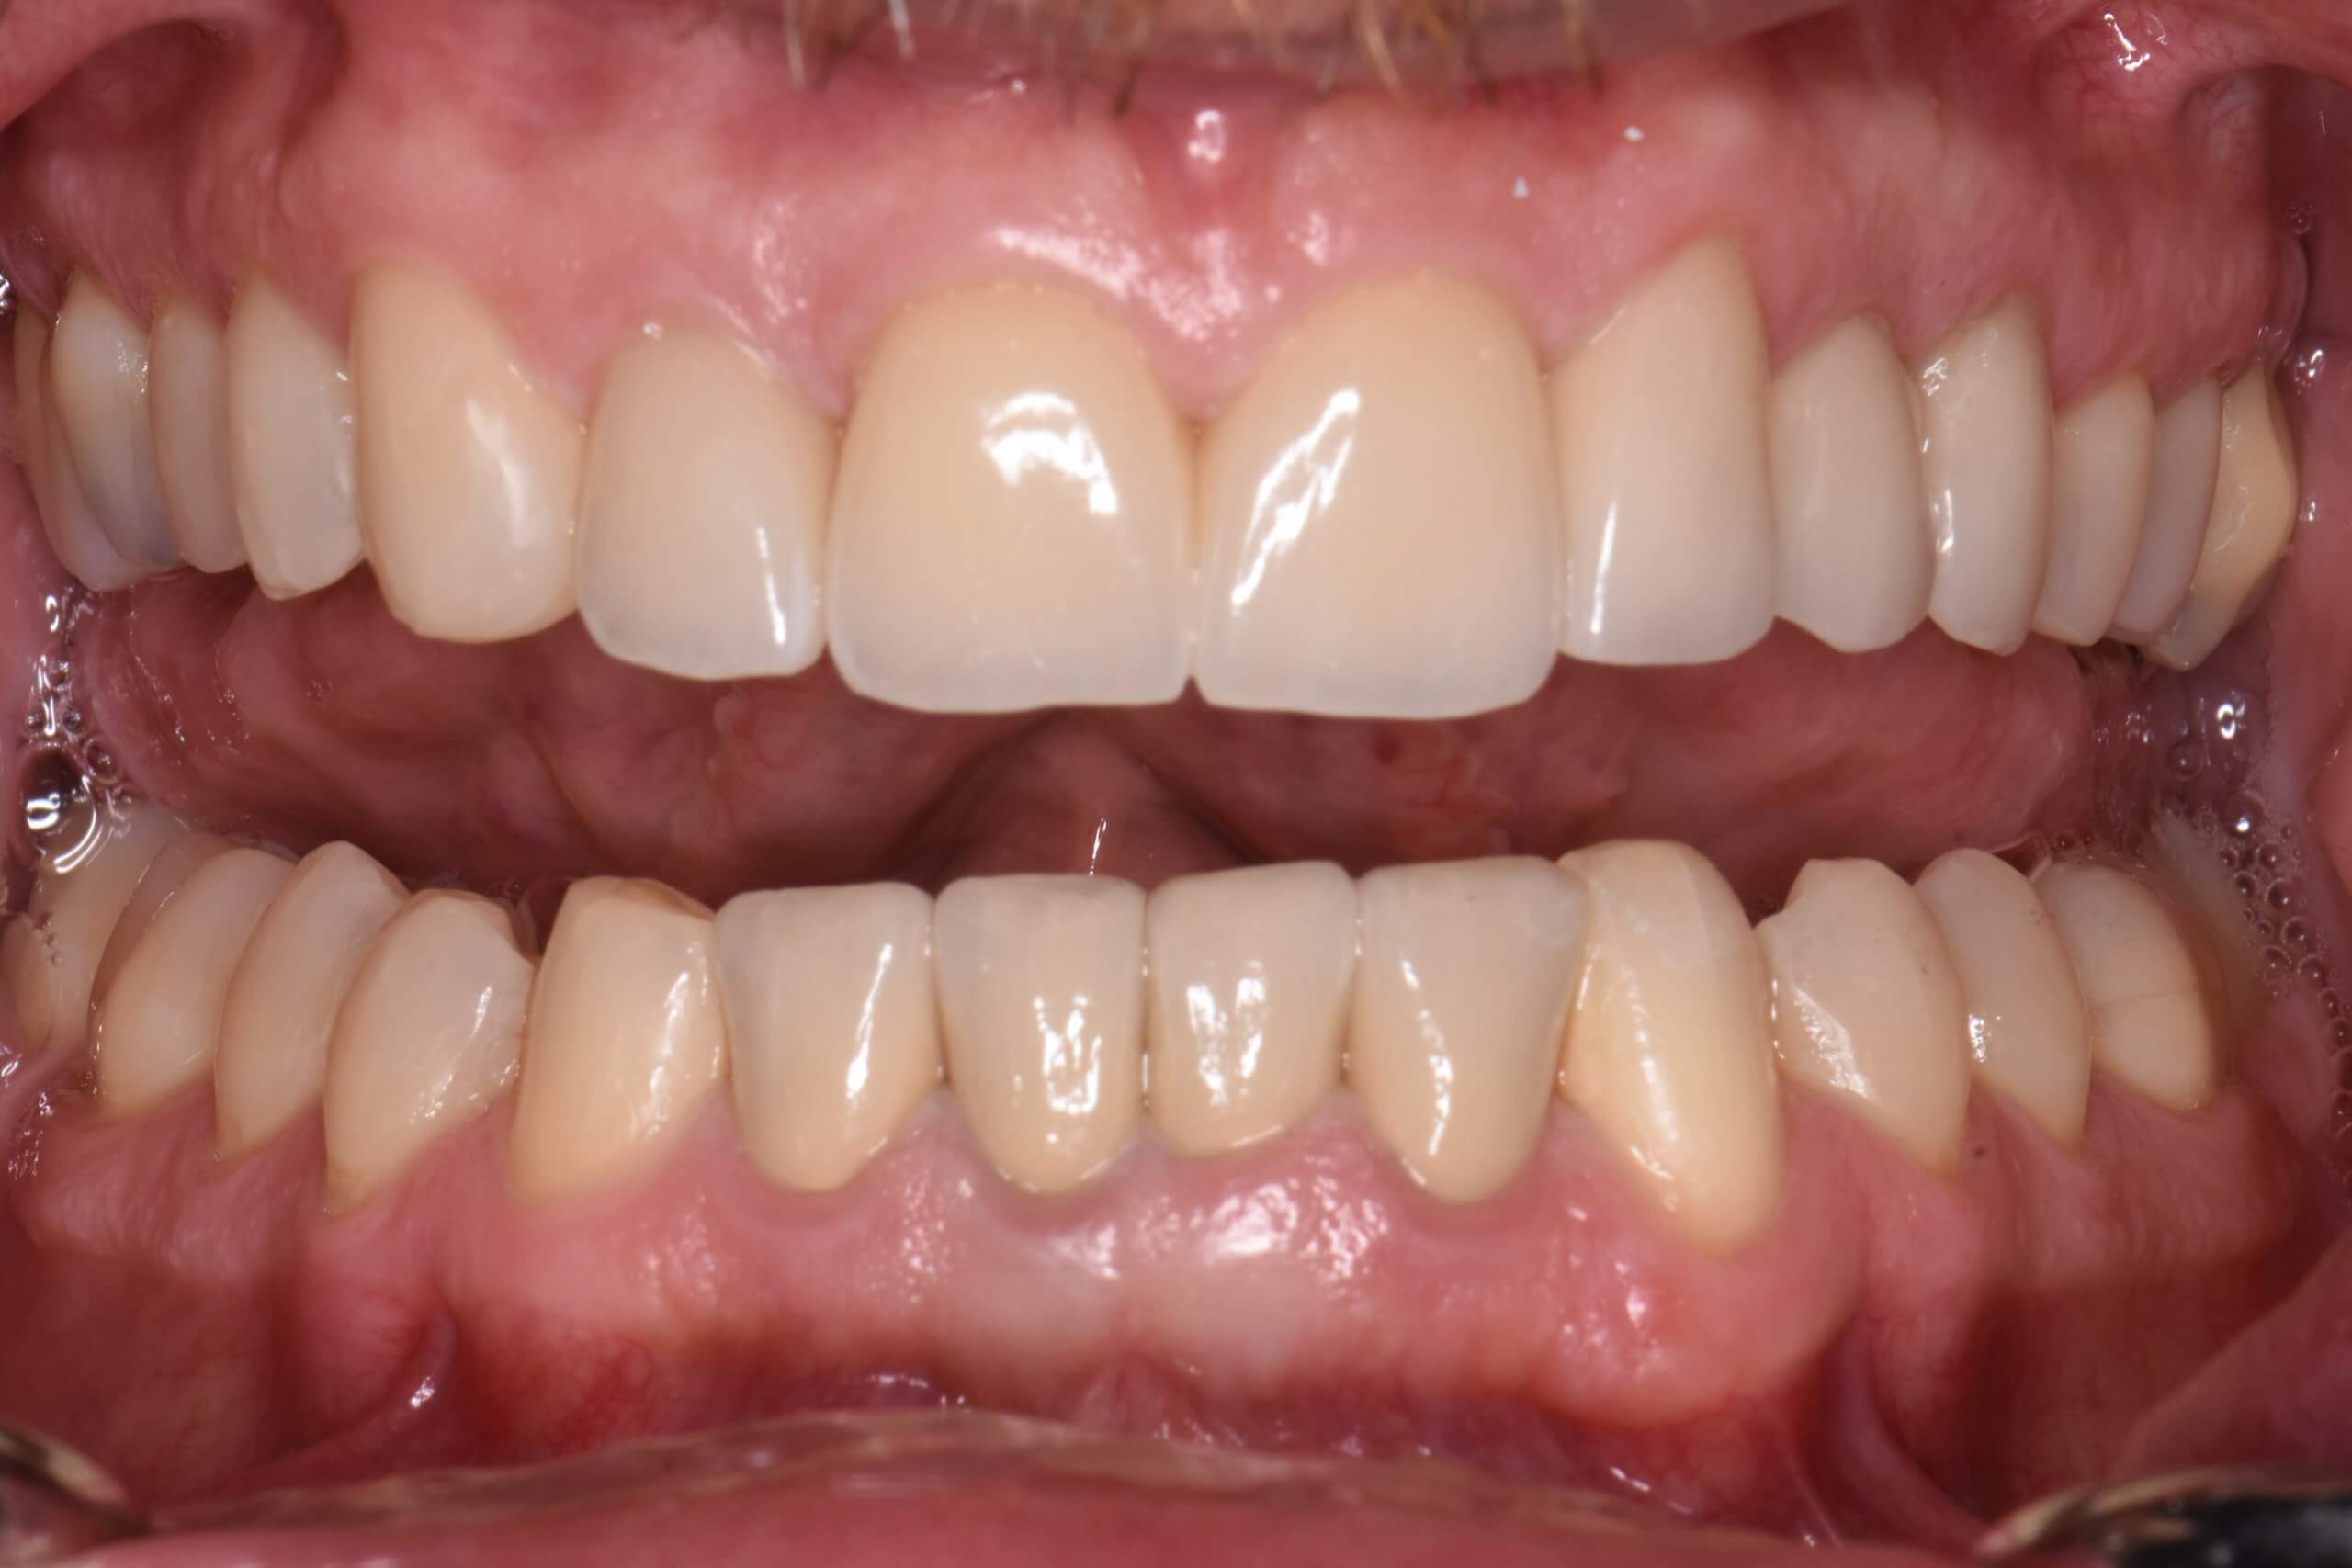
In this photo, you can see the completed lower anterior crowns, the upper anterior temporary crowns, the re-shaped upper right canine, and the very nice bleaching results.
We were now just waiting for the lab to return the permanent crowns and veneers.
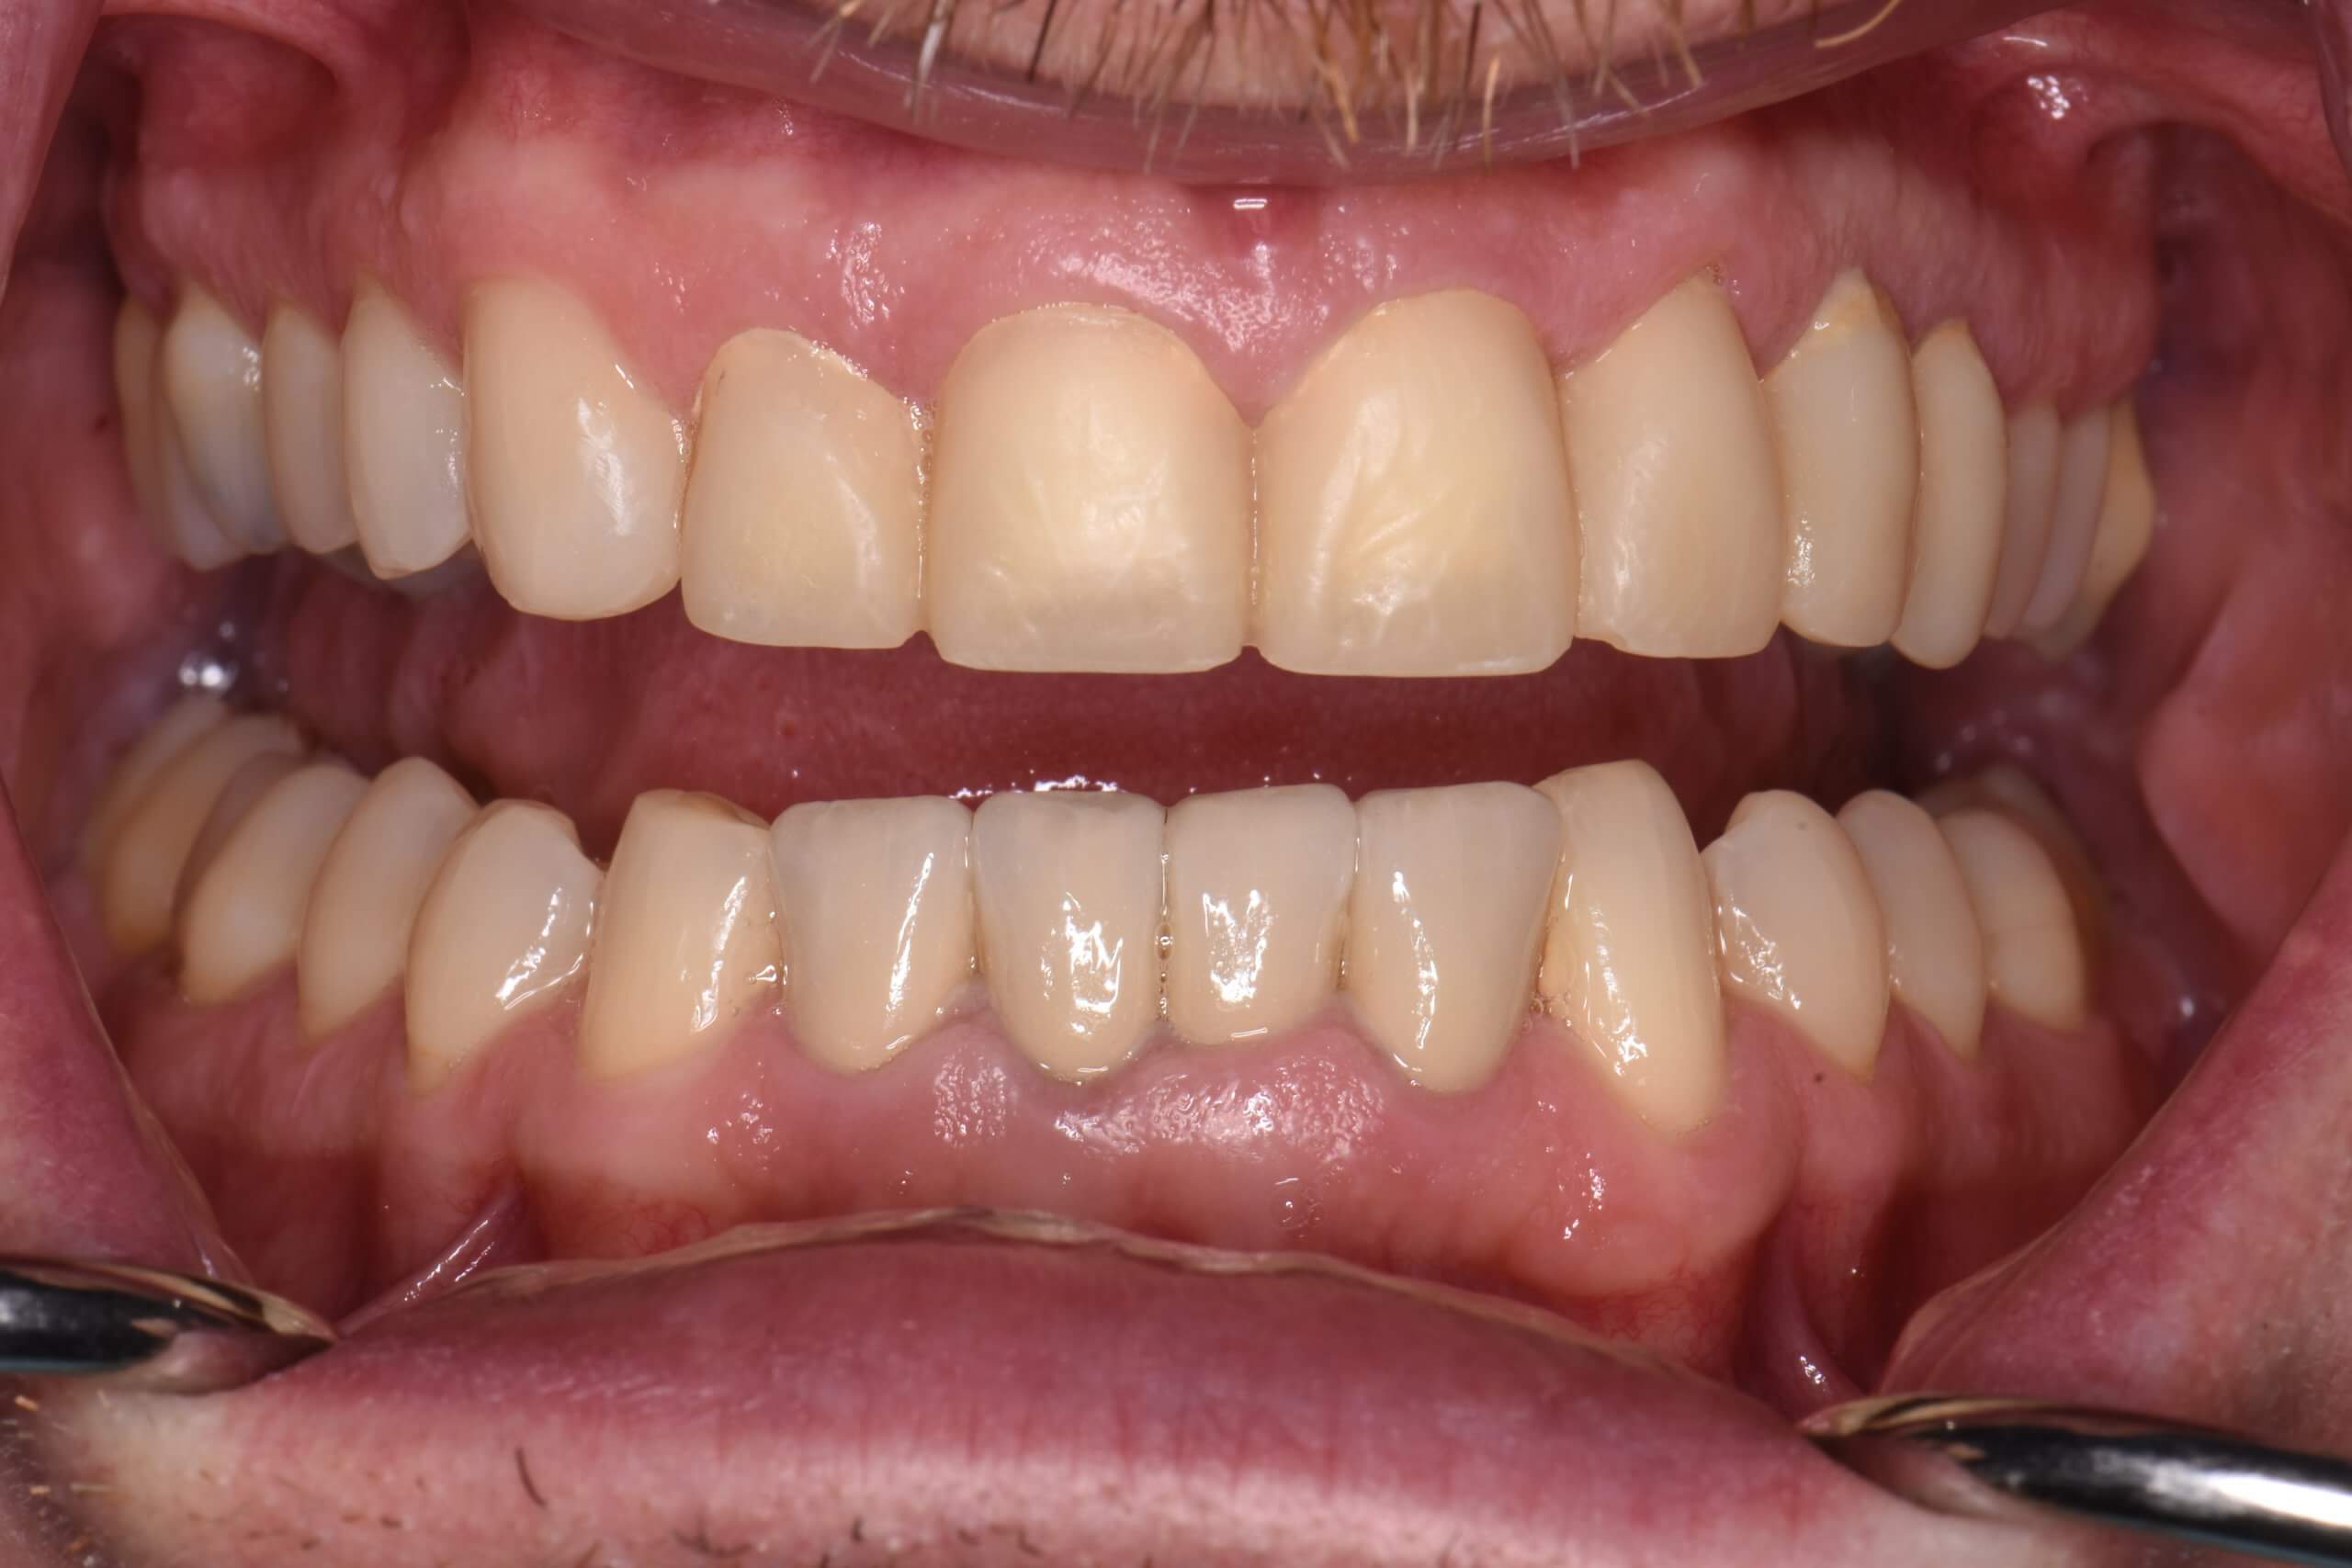
Nearly complete; awaiting permanent crowns and veneers
The (smile-worthy!) finished product
At the final appointment, we cemented the crowns and again confirmed the functional movement of the patient’s bite. This step completed a really significant transformation. The patient was very pleased. In addition to the esthetic improvement, we provided the patient with a solid foundation that minimizes the risks to his dentition.
Our last step was to fabricate retainers to hold and protect patient’s teeth for the long term.